One of my goals this year is to slow down and take the time to document my quilt making process. Of course, I love taking the finished quilt “glamour shots”, but especially as my makes become more complicated, I really want to make sure I capture things from start to finish. This is mostly for me to remember things, but hopefully it will be interesting to someone else too 🙂
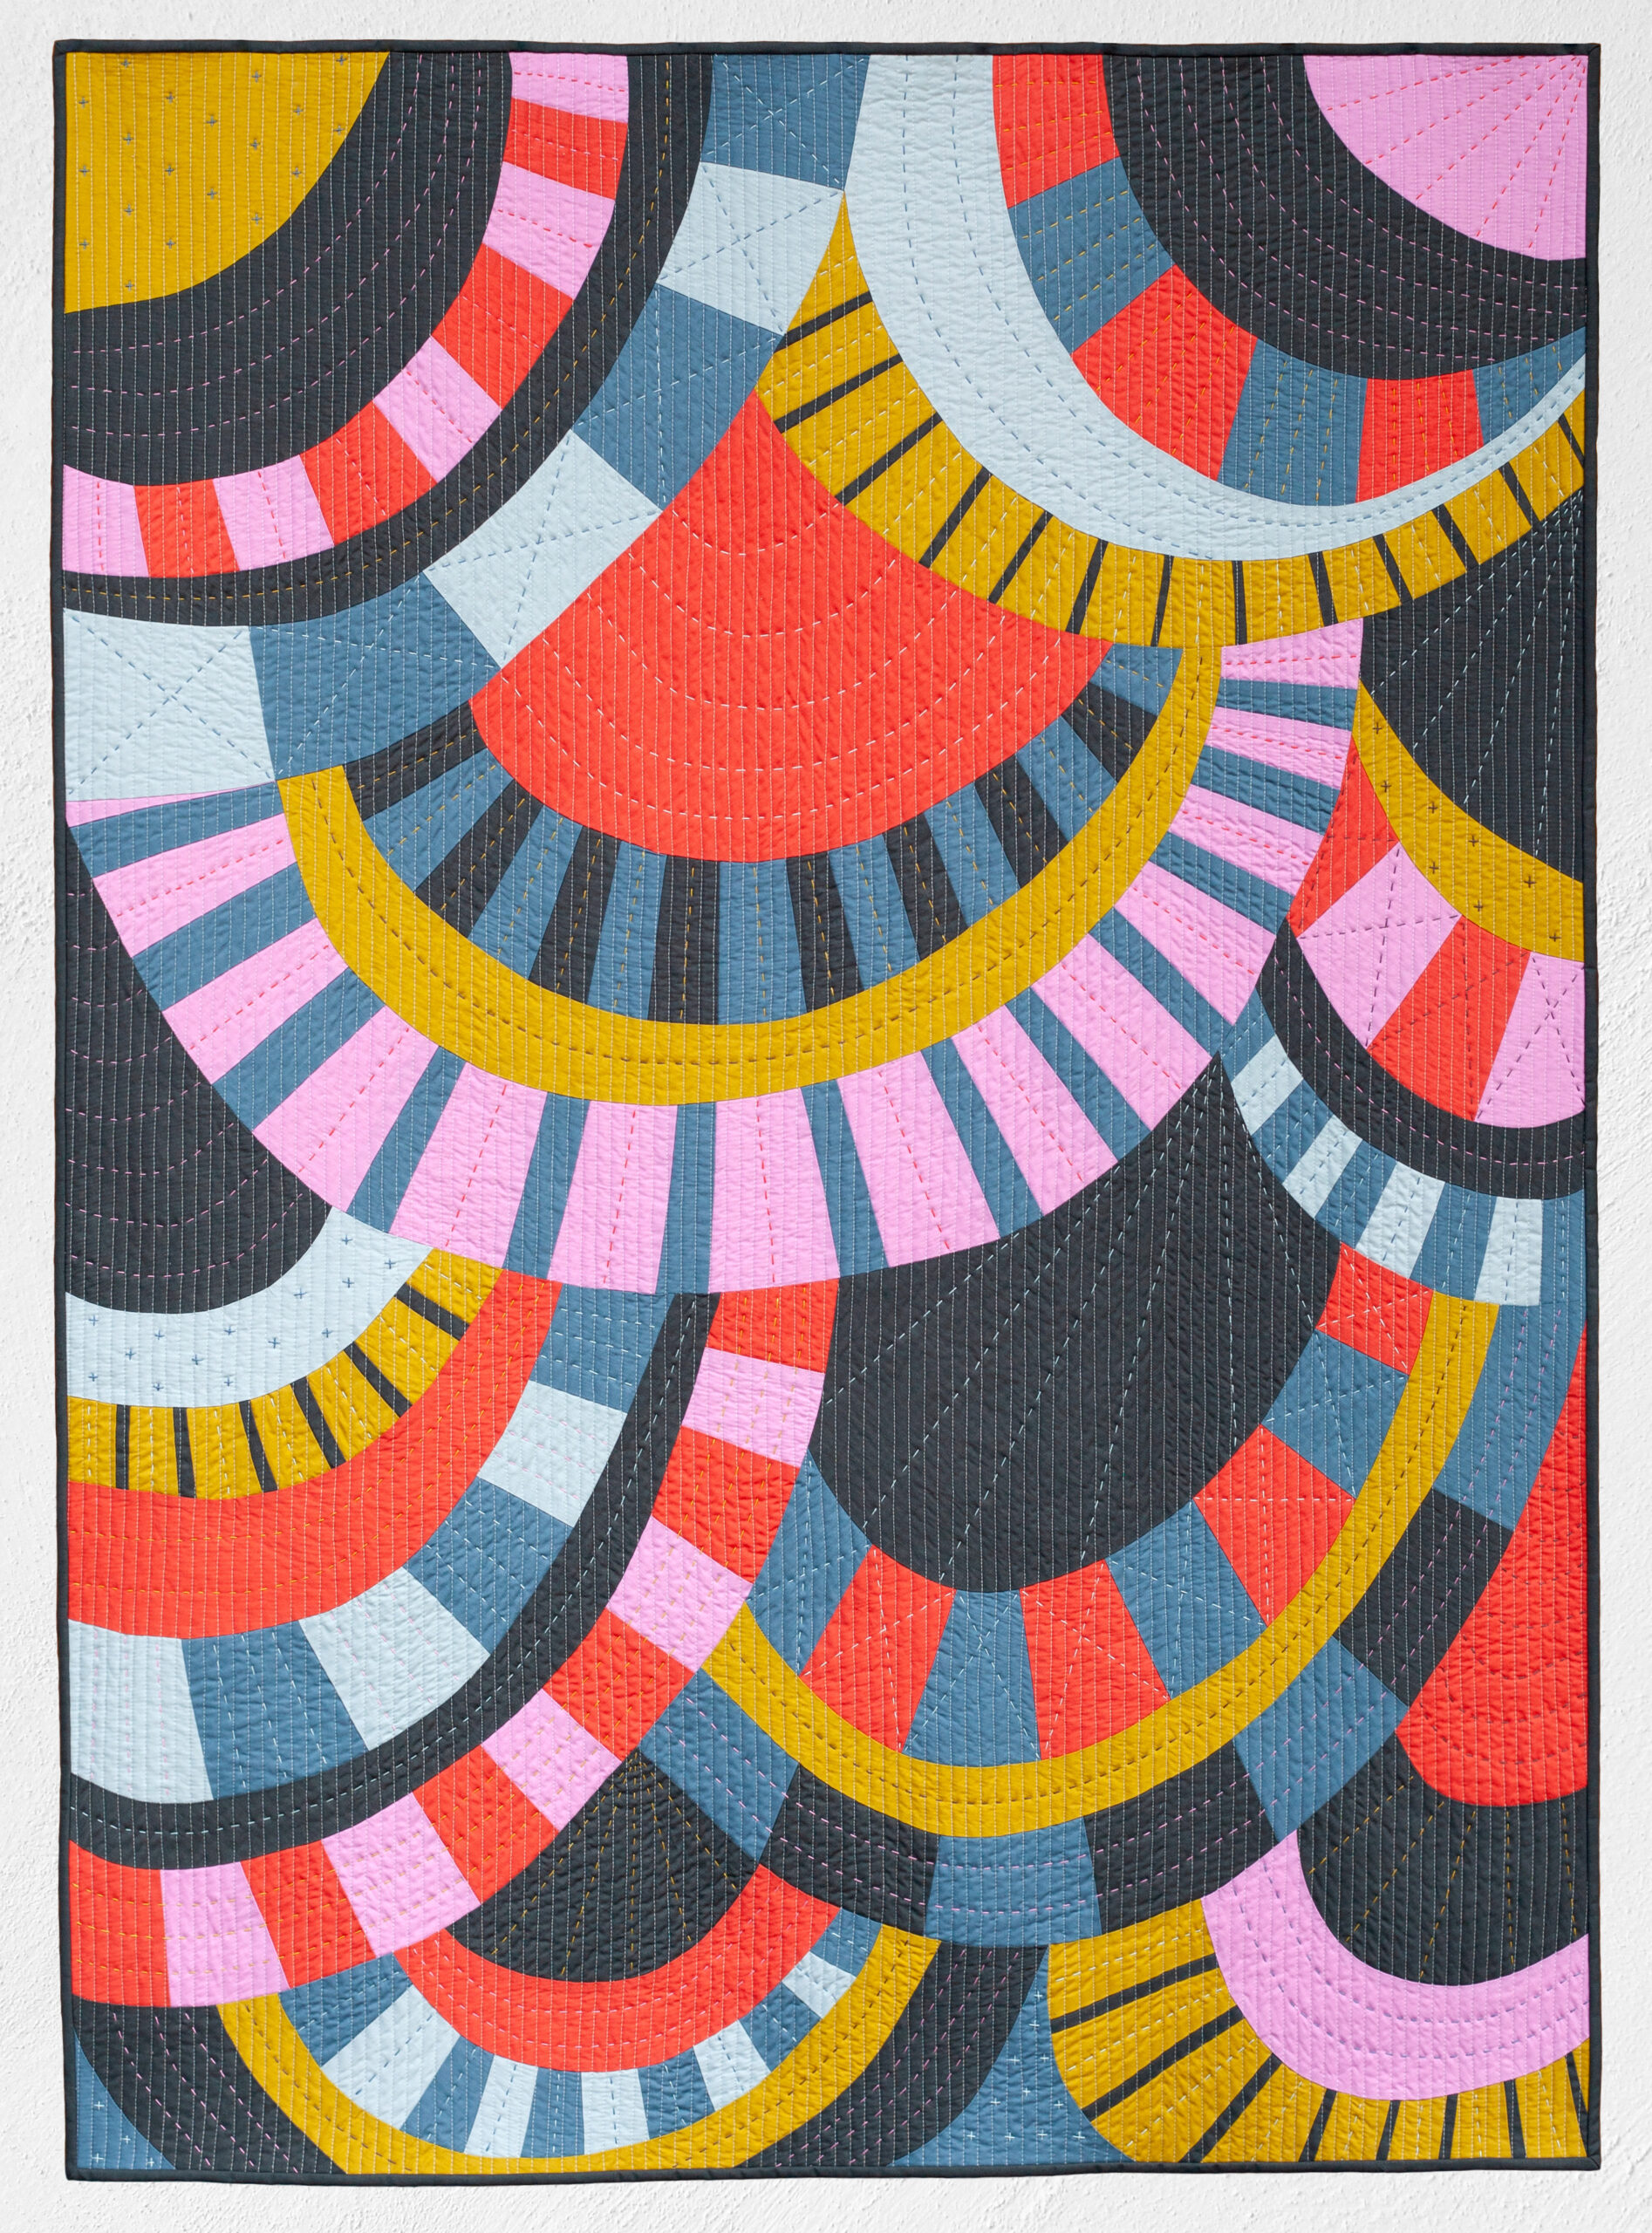
My newest quilt, Clamshell Jamboree, took about 10 weeks to complete (which is fast for me!) and is my most intricate quilt yet. This is my 4th project to use curves and I really pushed myself with this one! Happily, this cured any curve reservations I had, and I’m now pretty confident sewing them.
Clamshell Jamboree will make its public debut at QuiltCon2025 in Phoenix, AZ in the fabric color challenge category. I’ll add a pic of it hanging in the show when I get back!
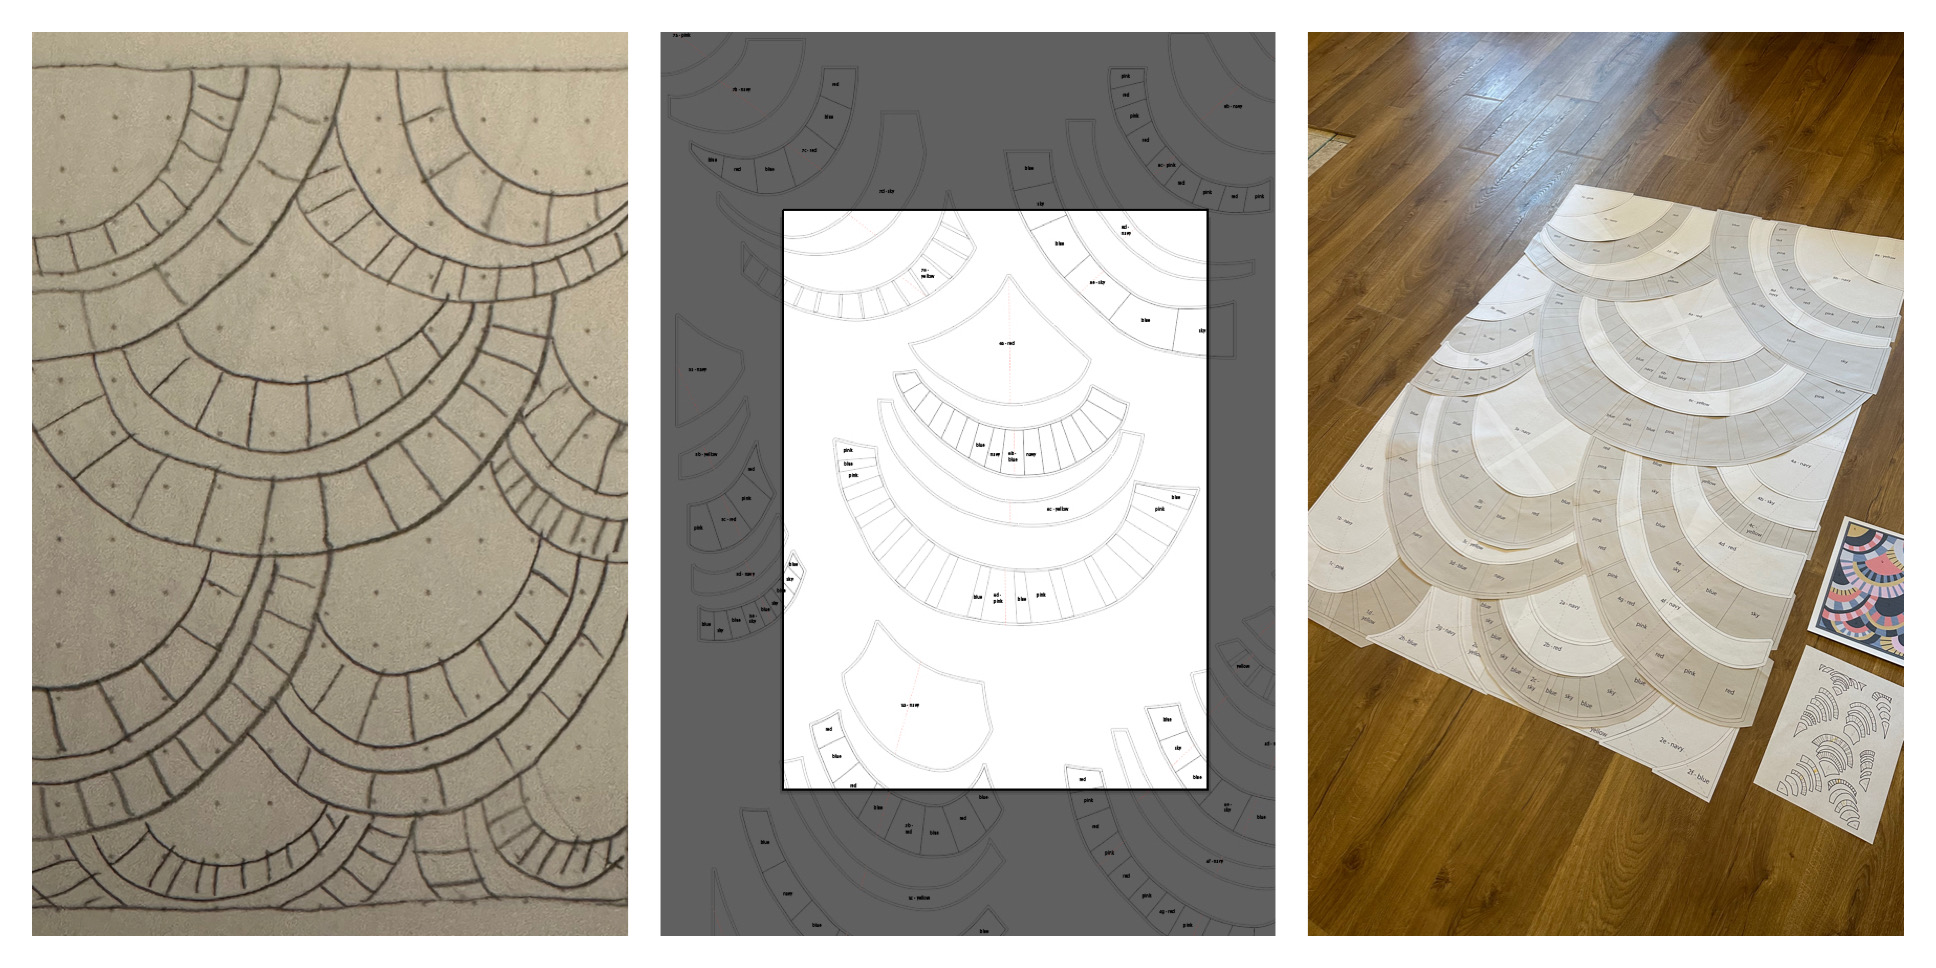
Above is my initial sketch in my sketchbook. I normally design on my computer first, but with this one, it seemed easier to draw it out on paper first. I took the sketch into my computer to trace and clean up a bit, but I actually really liked the wonky, hand drawn feel, so I tried to keep that in my computerized version.
I then inverted the sketch to prep it for paper piecing, added seam allowance outlines, and color references. I printed the big curve templates on regular printer paper to save money on the fancy paper piecing paper. The templates were so large that most needed to be glued together! Next I laid out my paper pieces to make sure things looked correct. I was so happy when it looked like my sketch!
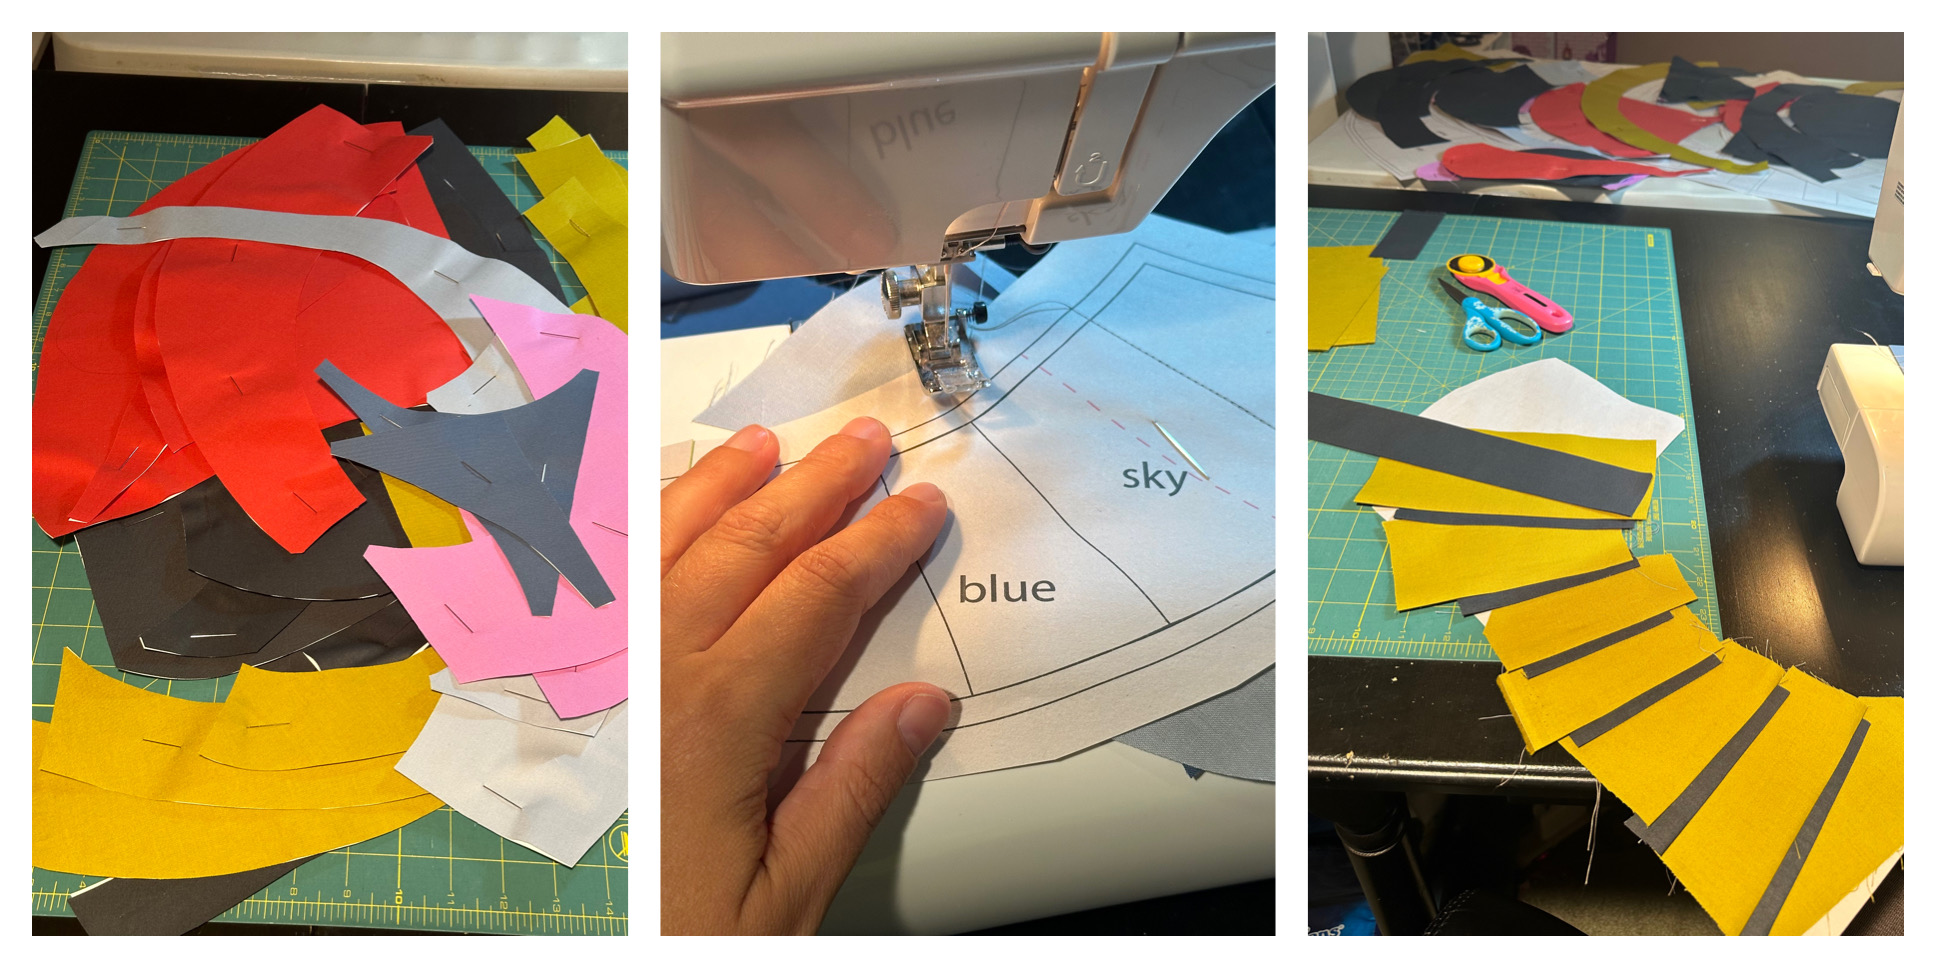
I cut all of my sold color curved pieces first to get brave enough to tackle the big paper pieced curves. They got wonky!! Although time consuming, this step wasn’t as hard as I thought it might be with the paper as the foundation.
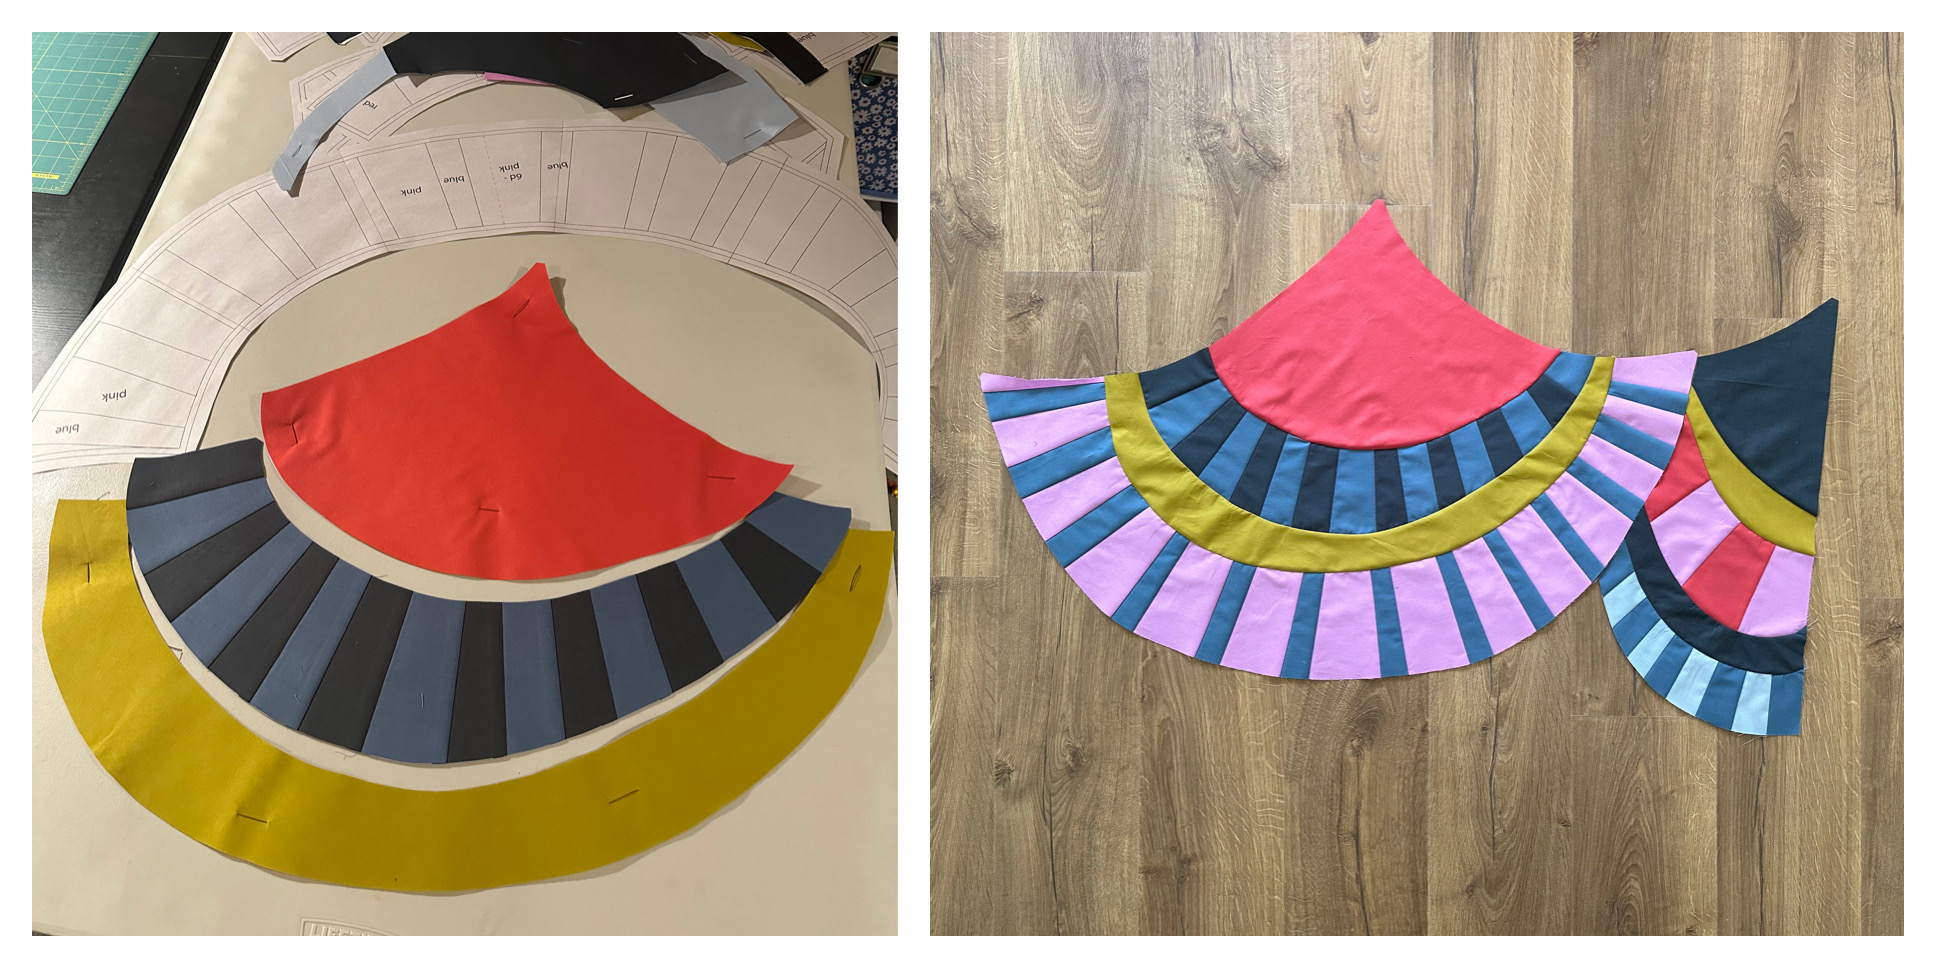
Above are my first finished curves and my first finished “clamshells”. When I laid the first 2 clamshells out, I got so excited. I thought to myself – this might actually work!!!
The fabric for this quilt is Ruby + Bee solids from Windham fabric. The colors were chosen specially for the QuiltCon fabric color challenge. Each year has a different palette, but I was so excited about the palette this year. It was right up my alley and I think it worked really well with this design. The colors are Stormy, Tumeric, Slate, Poppy, Rain Cloud, and Unicorn.
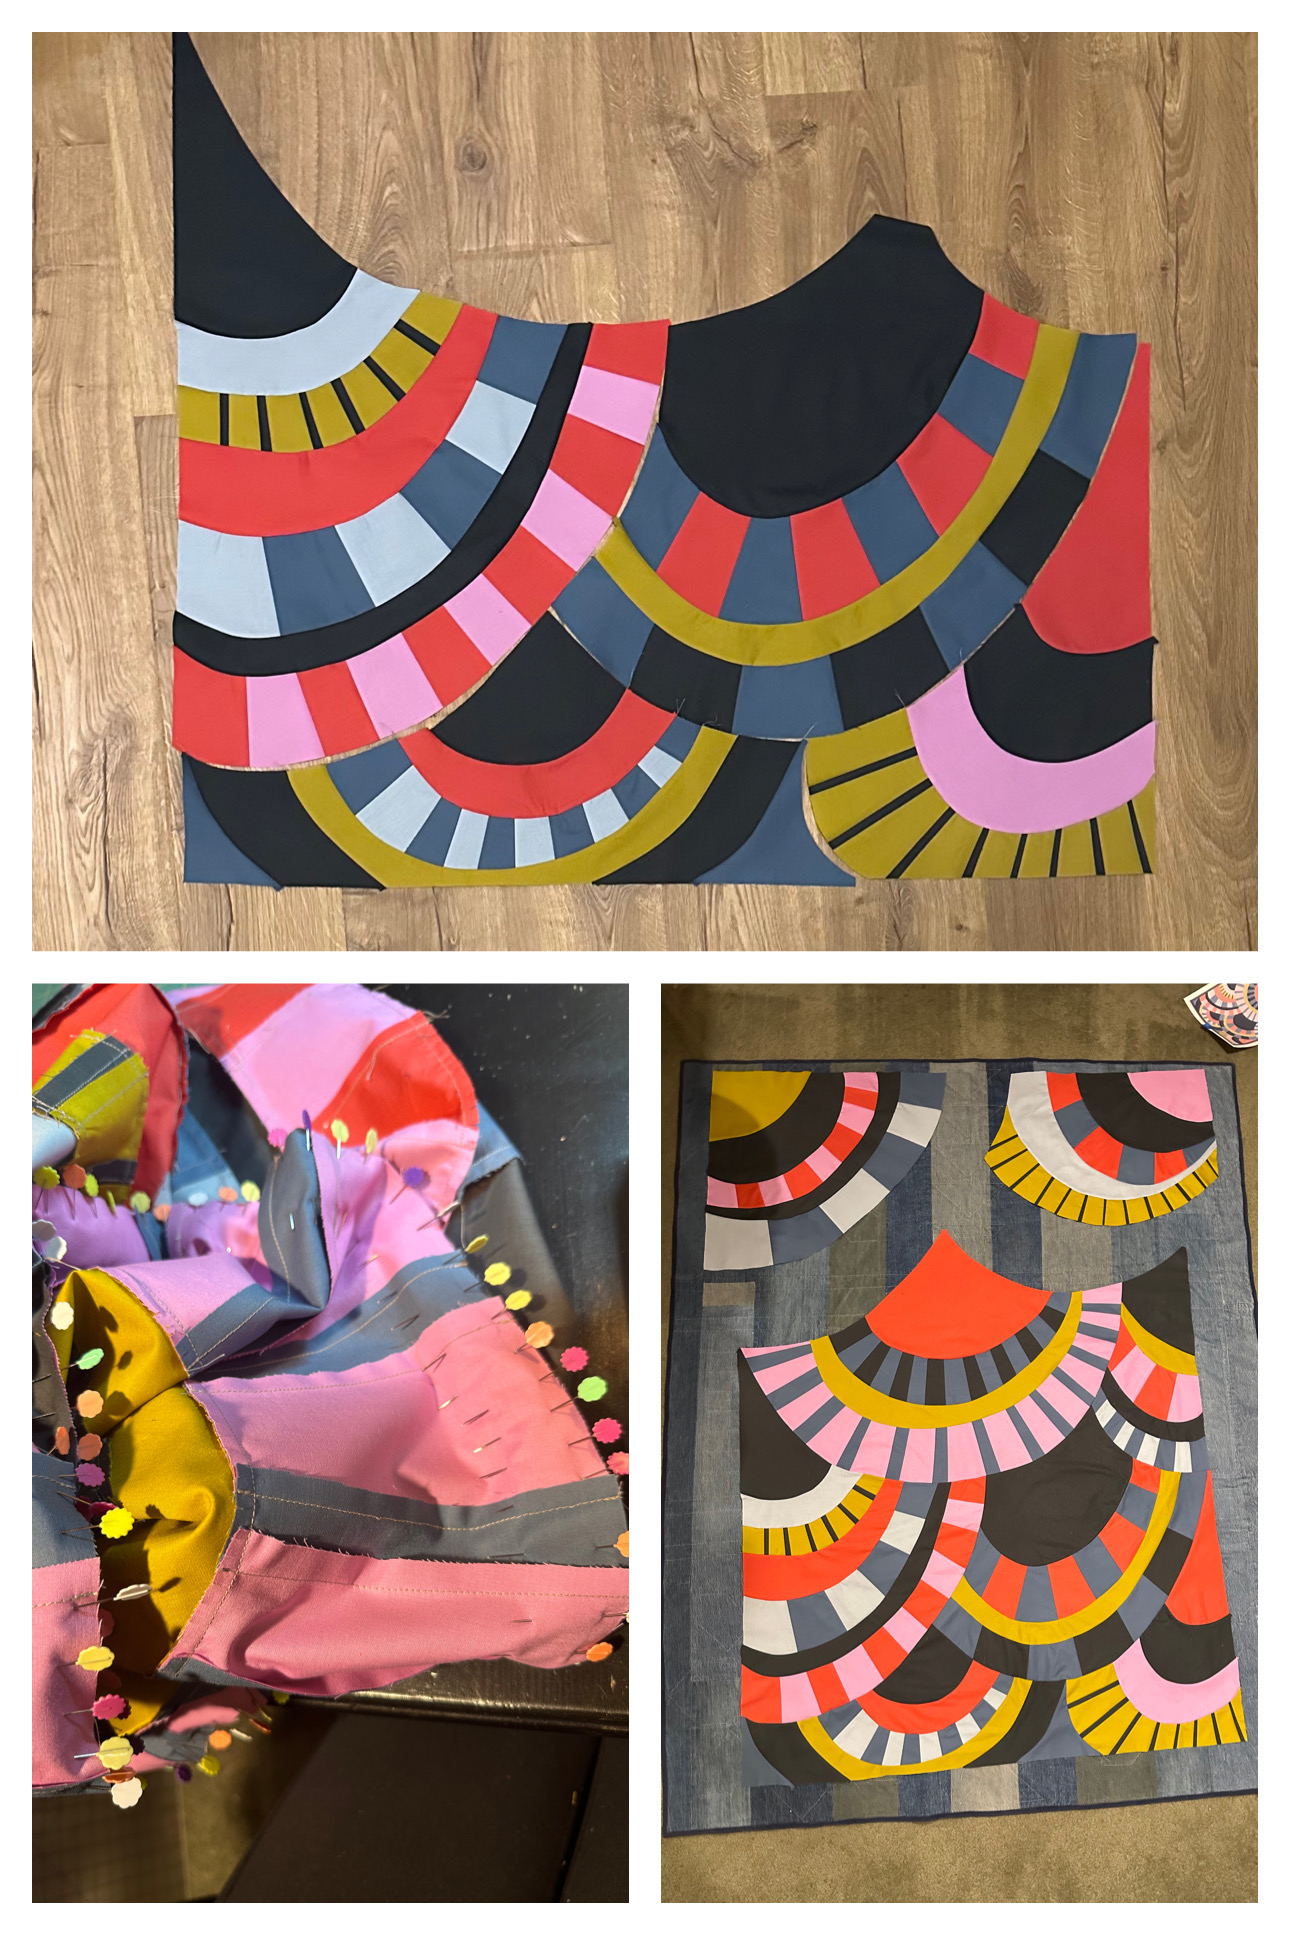
The pictures above are a few more overhead shots of laying out the clamshells. Every time I put a new clamshell down I was nervous that it wasn’t going to fit, but they all did! The bottom right photo shows everything sewn together except for the 2 top clamshells. Before I started, I had a very specific order the blocks had to be assembled in. It felt so good to get to those last ones!
The bottom left photo shows how many pins I put in while sewing. Do you think I have enough?! HA! I like to pretend I’m not a pinner. But I love having everything secure and spaced out properly before starting to sew. But even that didn’t prevent me from having to get out the seam ripper every once in a while. I would say for each clamshell, I had to unpick one curved section.

I pieced together the backing using my bigger scraps. I really like how the orderly rectangles juxtapose the wild, curvy front of the quilt. Then I pin basted everything together. I knew I was going to add dense straight line quilting, but I also knew the curves were not going to give me any guides that I was keeping the stitches straight. So I taped a few lines across my quilt using painter’s tape to help mark. The tape started to come off as I quilted, so I ended up also marking these lines with my hera marker.
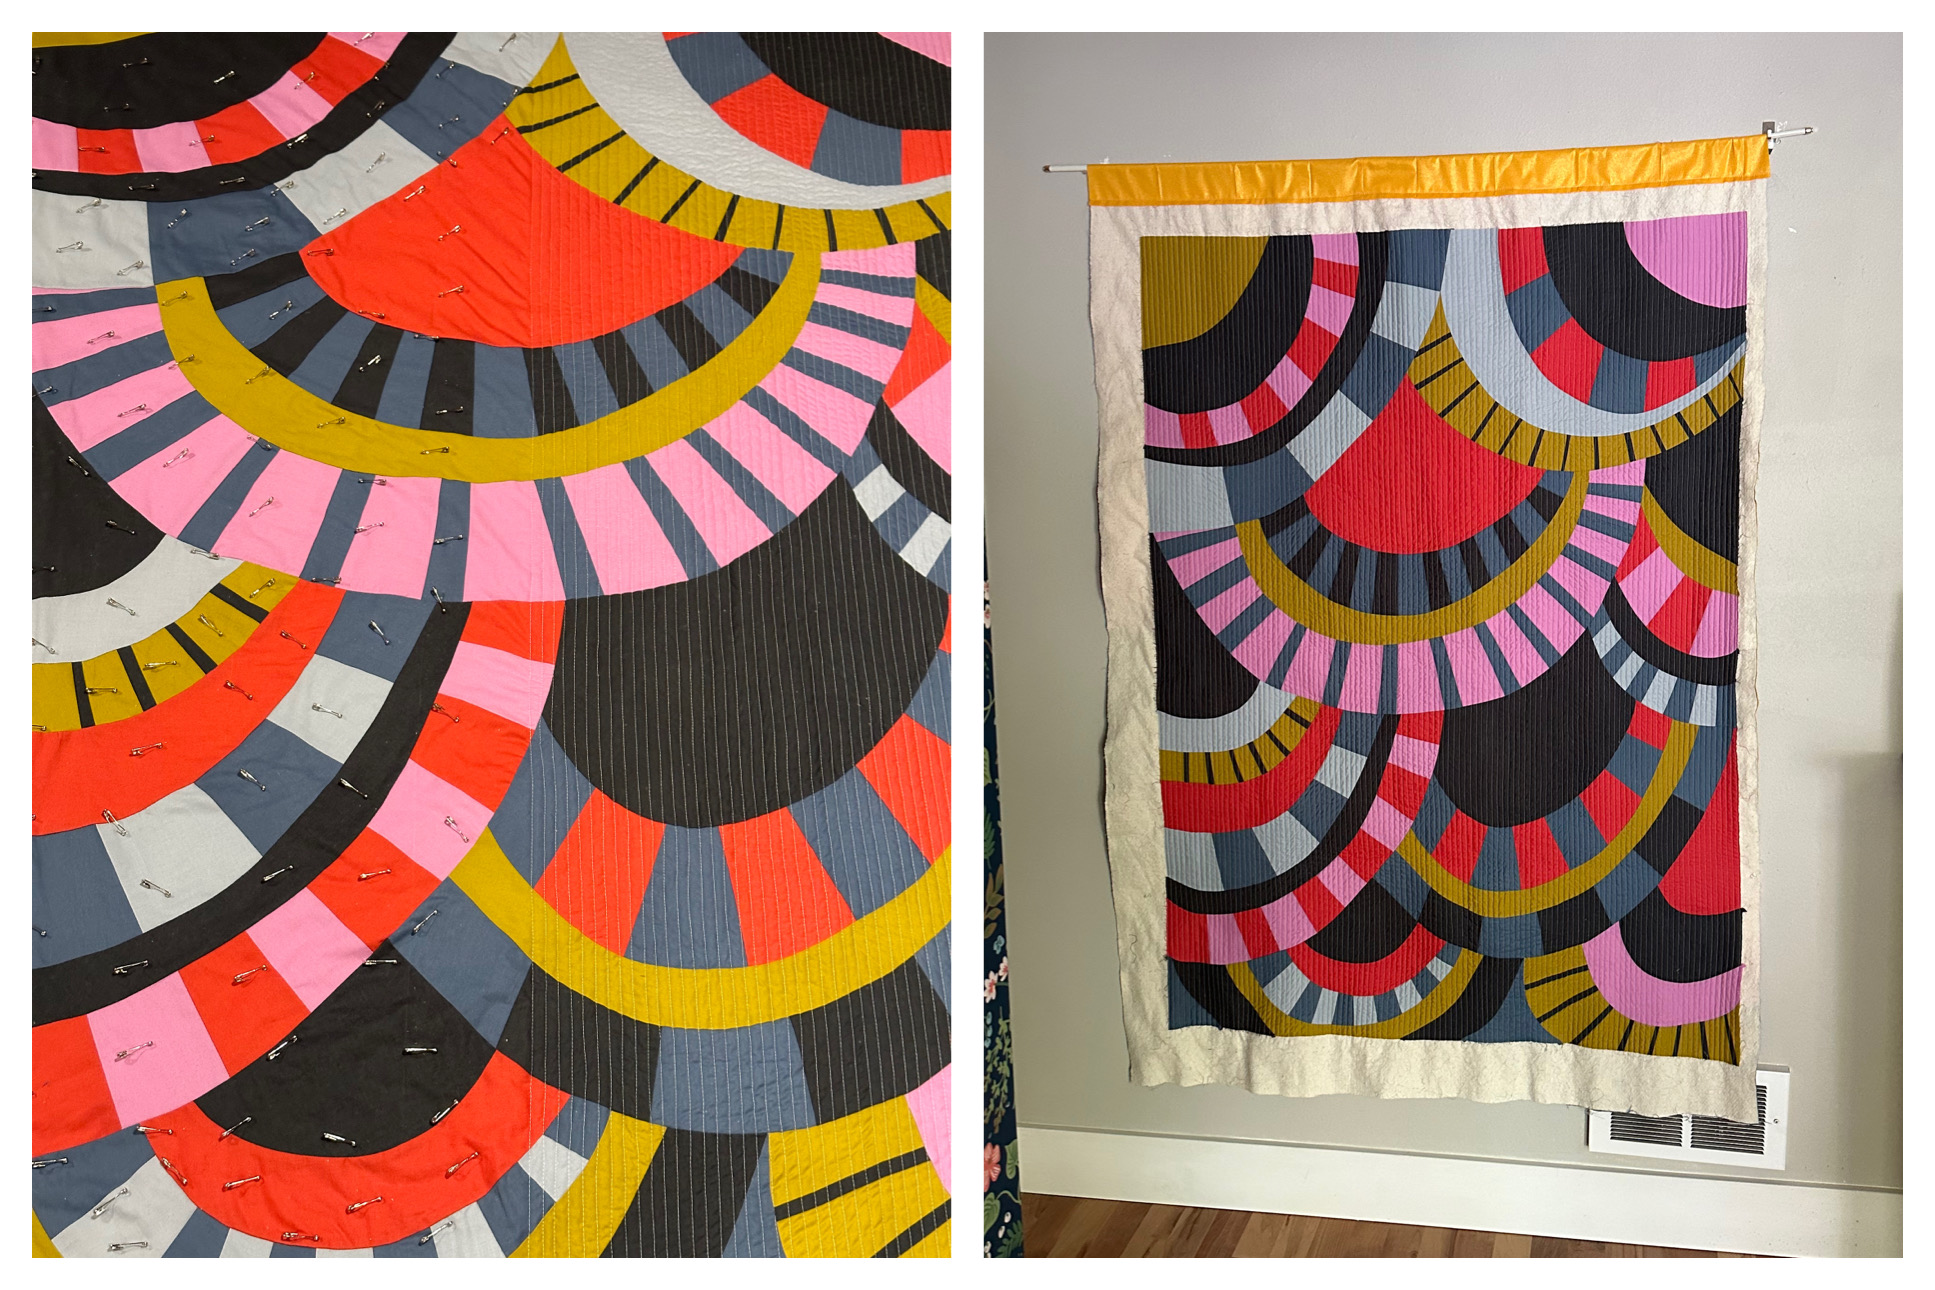
Above on the left you can see the quilt, half quilted. I started from the middle and worked to the outside. I don’t turn my quilt, so when the first half was done I rolled the quilted side tightly and started at the middle again, going towards the opposite side.
On the above right is the fully quilted piece on the wall. I had a leftover section of quilt sleeve that I just sewed to the top of the excess batting/backing. I don’t have a great spot for quilts to hang out while working on them and I didn’t want it to get messed up while made my hand quilting plan. Actually at first, I liked it so much I almost abandoned my hand quilting plan!

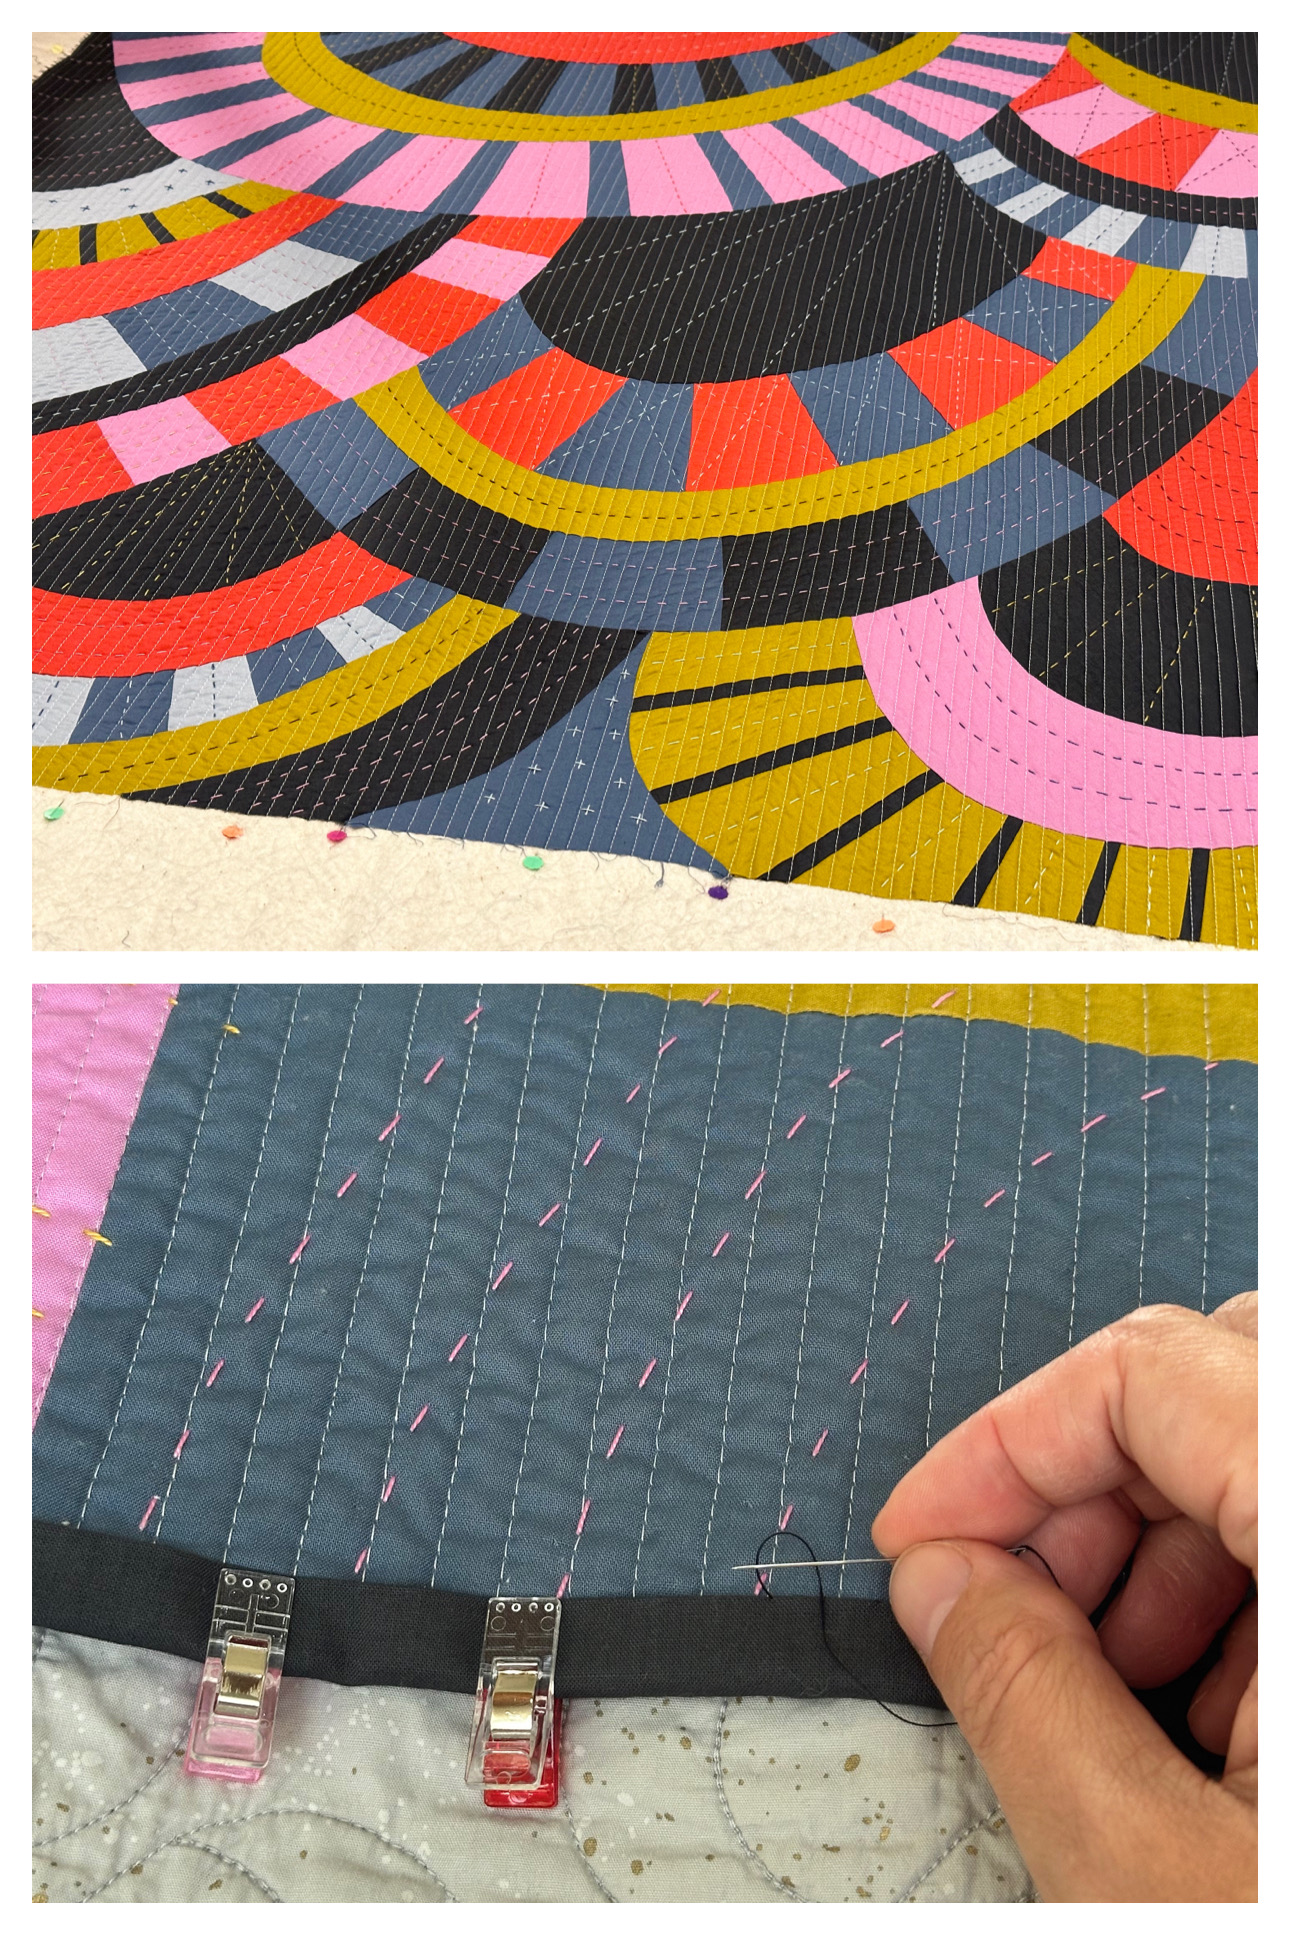
The top left picture is my hand quilting plan in my computer. I adjusted and played with so many combinations. Once I saw it on my computer, I knew it was going to add so much! I decided to use Wonderfil perle cotton 8 for the big stitch hand quilting. It stands out so beautifully and adds such a great texture.
The top right and bottom left pictures were the first sections I hand quilted. I was still a little nervous about adding the hand quilting at this point, so I kept checking that it was looking good. For some reason, seeing it on a phone picture is easier to tell if something is working then just looking at it!
The bottom right photo is my view of the quilt while I was hand quilting. I would try to quilt 2 hours each day. One hour in the morning and one in the afternoon. I would typically get through one medium sized curve in that amount of time. I marked most of my lines with my hera marker. But small sections and the plus signs, I just eyeballed.
When the machine and hand quilting were complete, the quilt had developed a bit of a wave. I had actually expected much worse, so I was confident a little blocking would do the trick (top photo above). We have a big carpeted area in our upstairs, so I just get it wet, lay it out, and pin it to the carpet.
My last few QuiltCon entries were faced, but this one told me it wanted a frame in the darkest color in the palette. I applied the binding by machine to the front of the quilt and then hand stitched it down to the back.
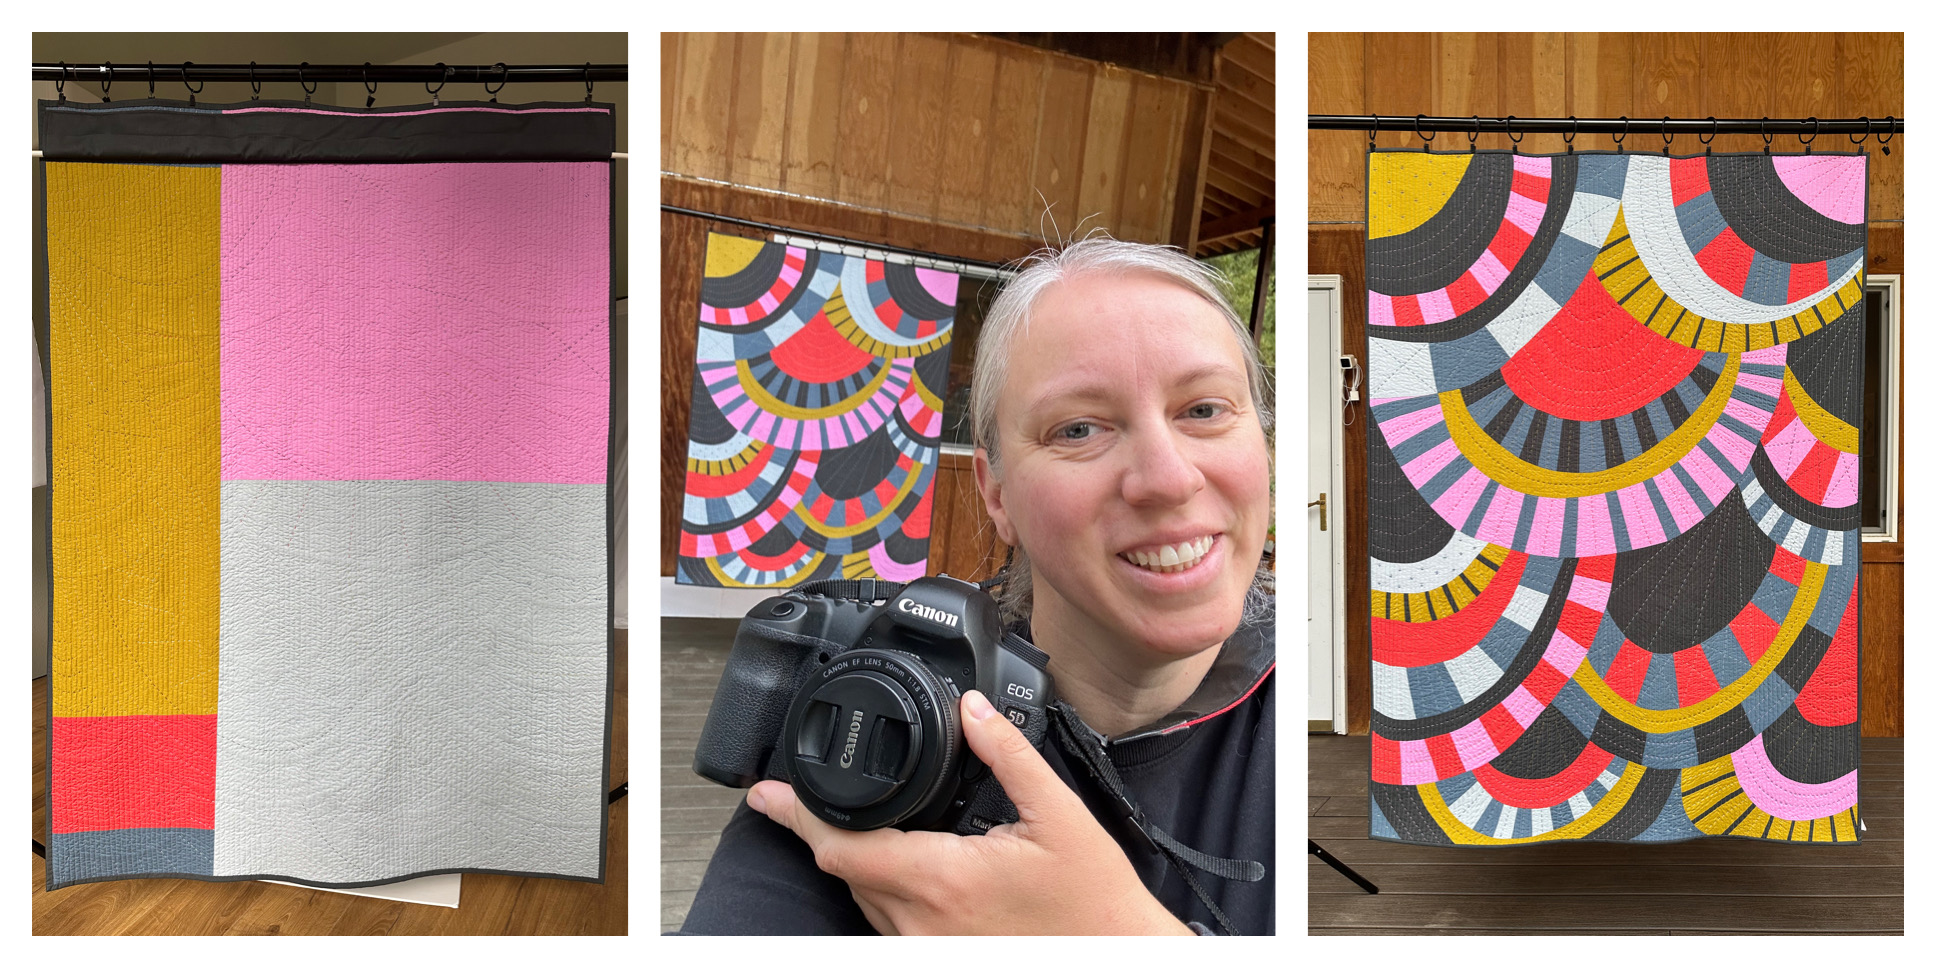
When the quilt was done, it was time for glamour shots! I started indoors but just couldn’t get an even light on anything, so I moved outside. The left photo is of the back. If you look closely, you can see the handstitching which shows the curves on the front.
I like to take a selfie while I photograph my finishes. You’d think I’d remember this and do my hair or makeup, but no, I always look a mess. But during so much of my process, I don’t get photos of me while I’m working, so I like to take this “proof of quilter” photo.
The far right photo above is the photo I used for my QuiltCon entry. But not without some post-processing. They request a white or light neutral background. I don’t have that around my house, but I am good at photoshop, so I remove the background and the clips holding it up. See final photo below.