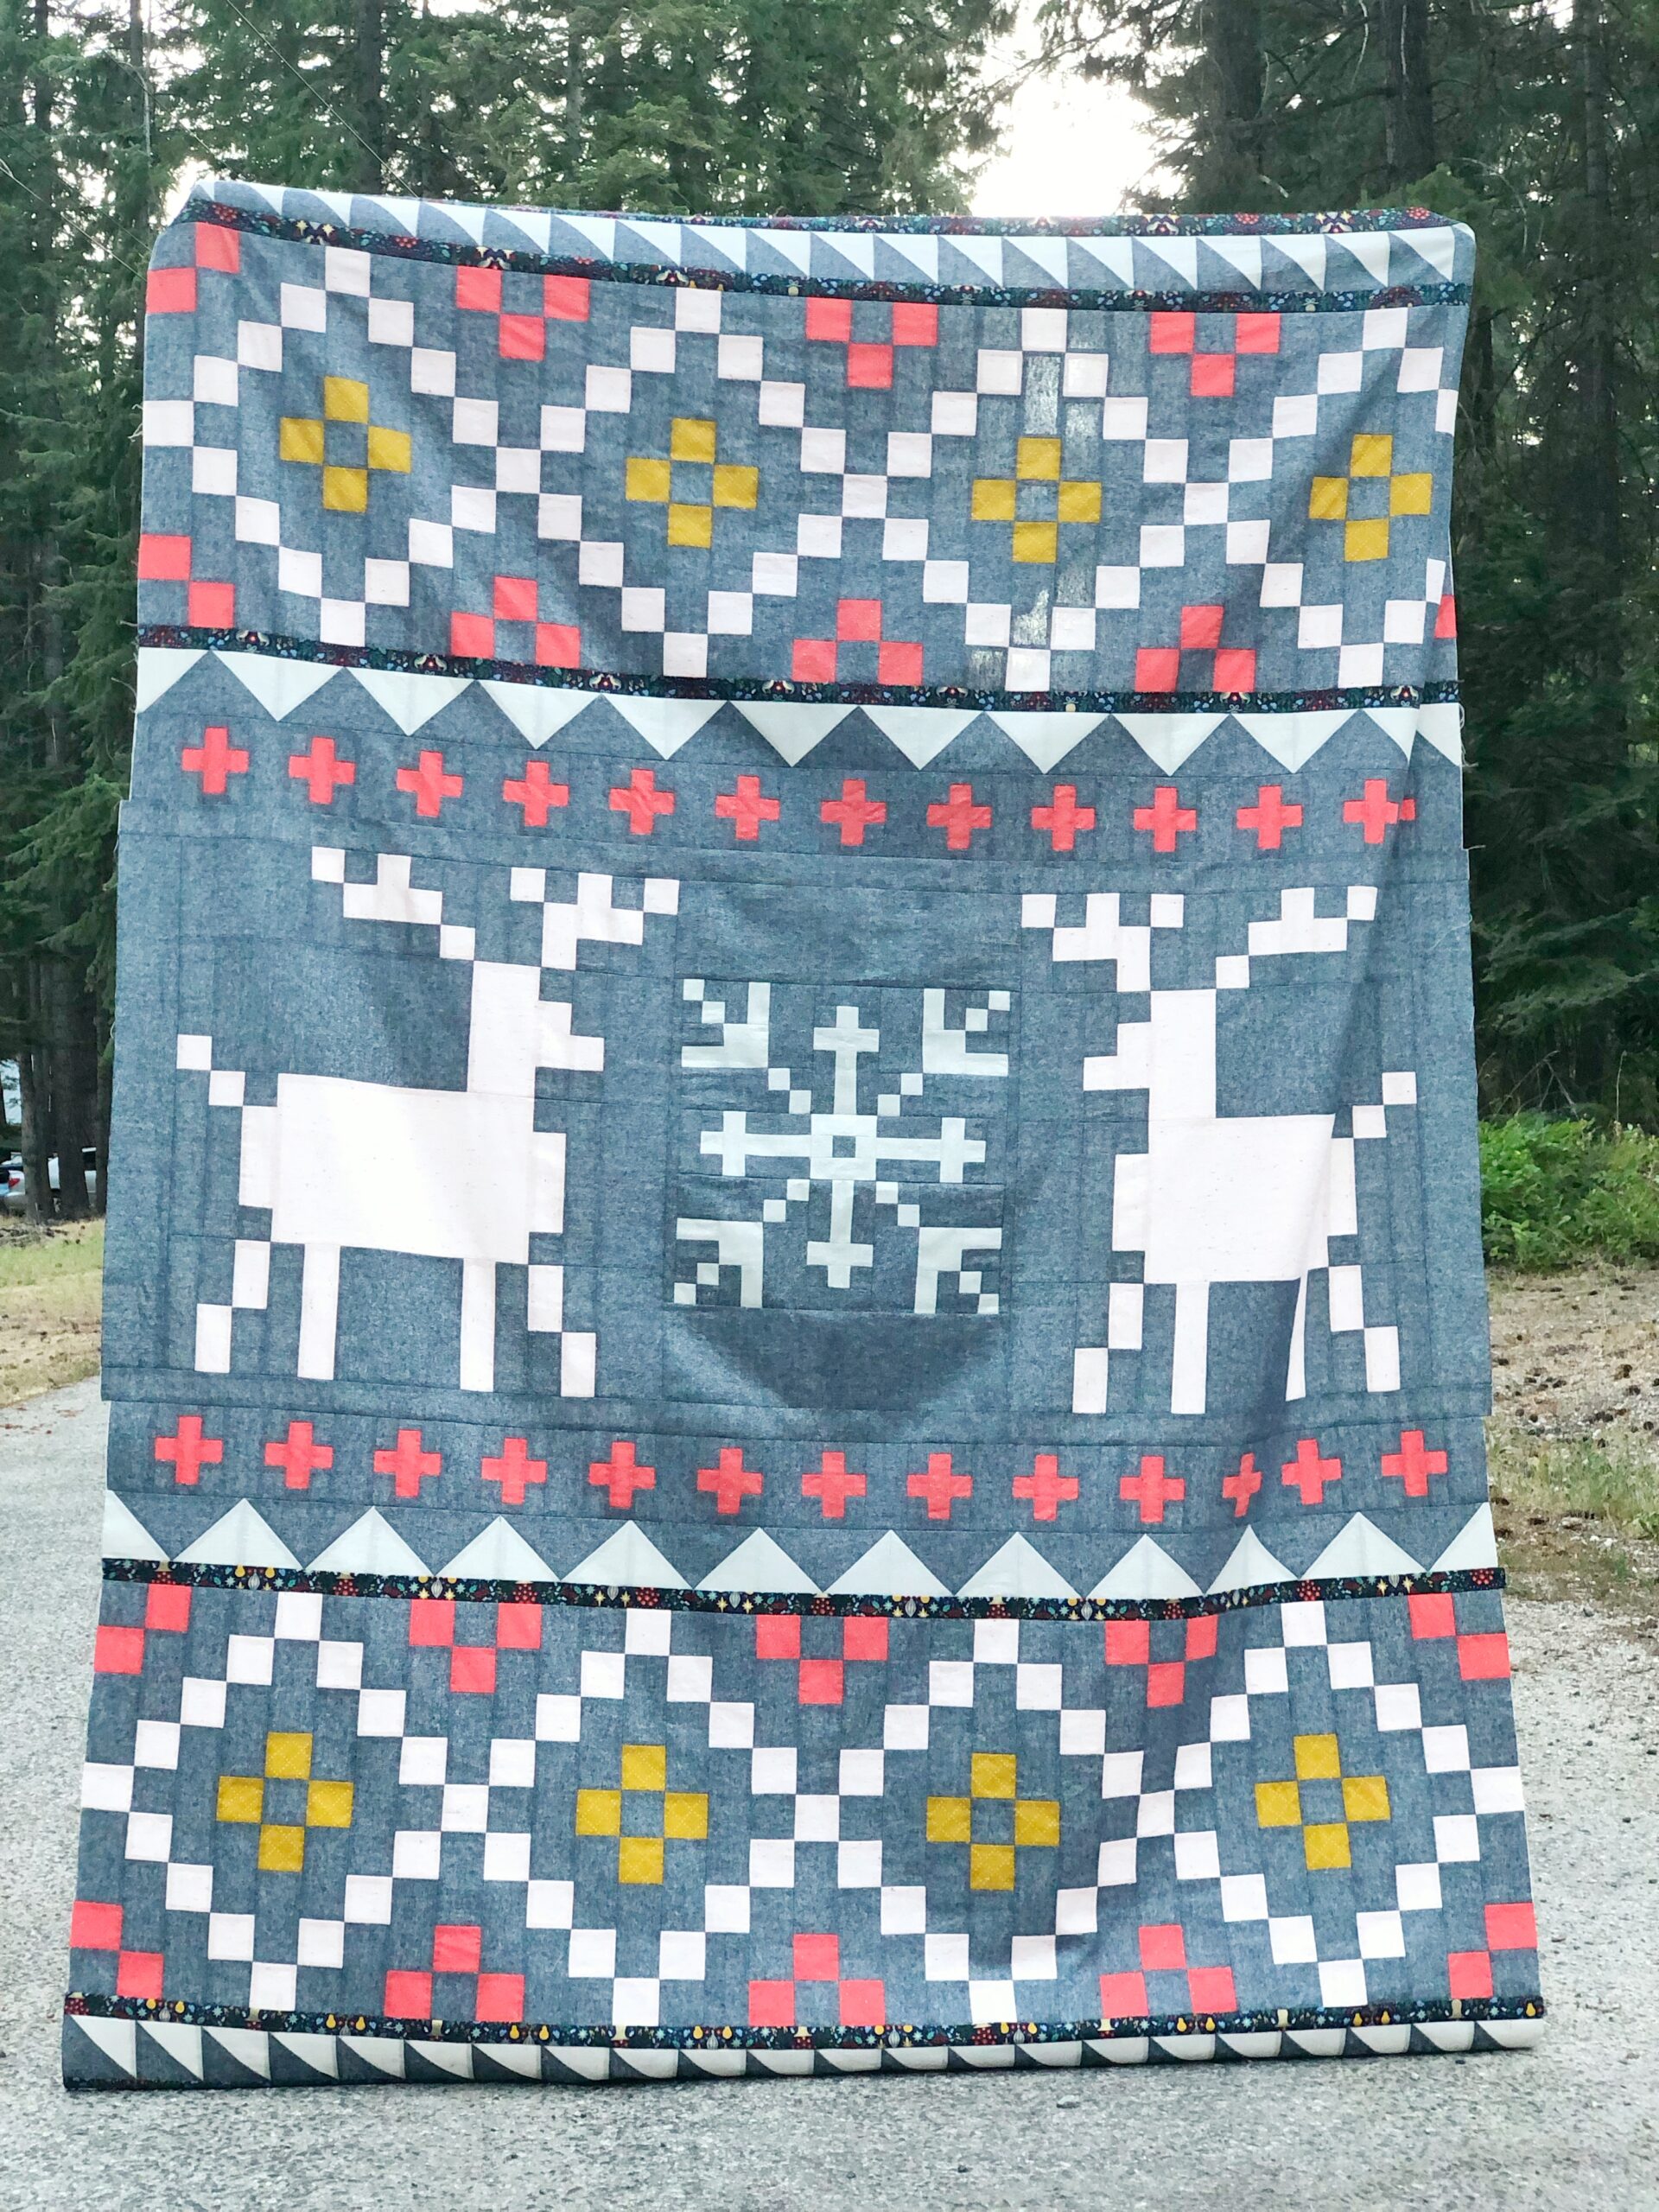
Hello quilt along friends! We’ve reached our 8th and final month of the quilt along! It’s been so much fun working on this quilt along with you all this year. I have loved seeing your versions coming together!! Last month we finished up our quilt tops! This is my finished quilt top below. It is much taller than I realized, and even my 6’4″ quilt helper couldn’t keep it off the ground! 🙂

Now that our quilt tops are finished, it’s time to think about how to quilt them. I would say this quilt top is on the bigger side for quilting on your regular machine, but it can be done (I did it on my first version!). I’ll show you what I did for that one, as well as talk about ideas if you are longarming it yourself or sending it to someone to finish it for you. I was very excited to send mine off to my friend Thea at Blue Heron Quilting to give my top the royal treatment!
Thea had so many awesome ideas for how to quilt my Reindeer Ridge top. We both thought something with curves would be a great way to break up all the straight lines in this quilt. She had the genius idea to mimic a knitted look with the quilting because this quilt was inspired by fair isle knit designs. Some keywords we tried while looking up quilting designs were “loops, curves, swirls, cable, knit, waves”.
Here are a few edge to edge designs similar to what I liked when looking at quilting designs. I wanted something not overly ornate or complicated but would still enhance the design of the quilt top. I ended up with 2 choices that I would describe as loops 🙂 I still need to pick my favorite, but I can’t wait to show you the finished result!

Of course, I also think it would also look great with completely custom quilting where you could highlight each row!
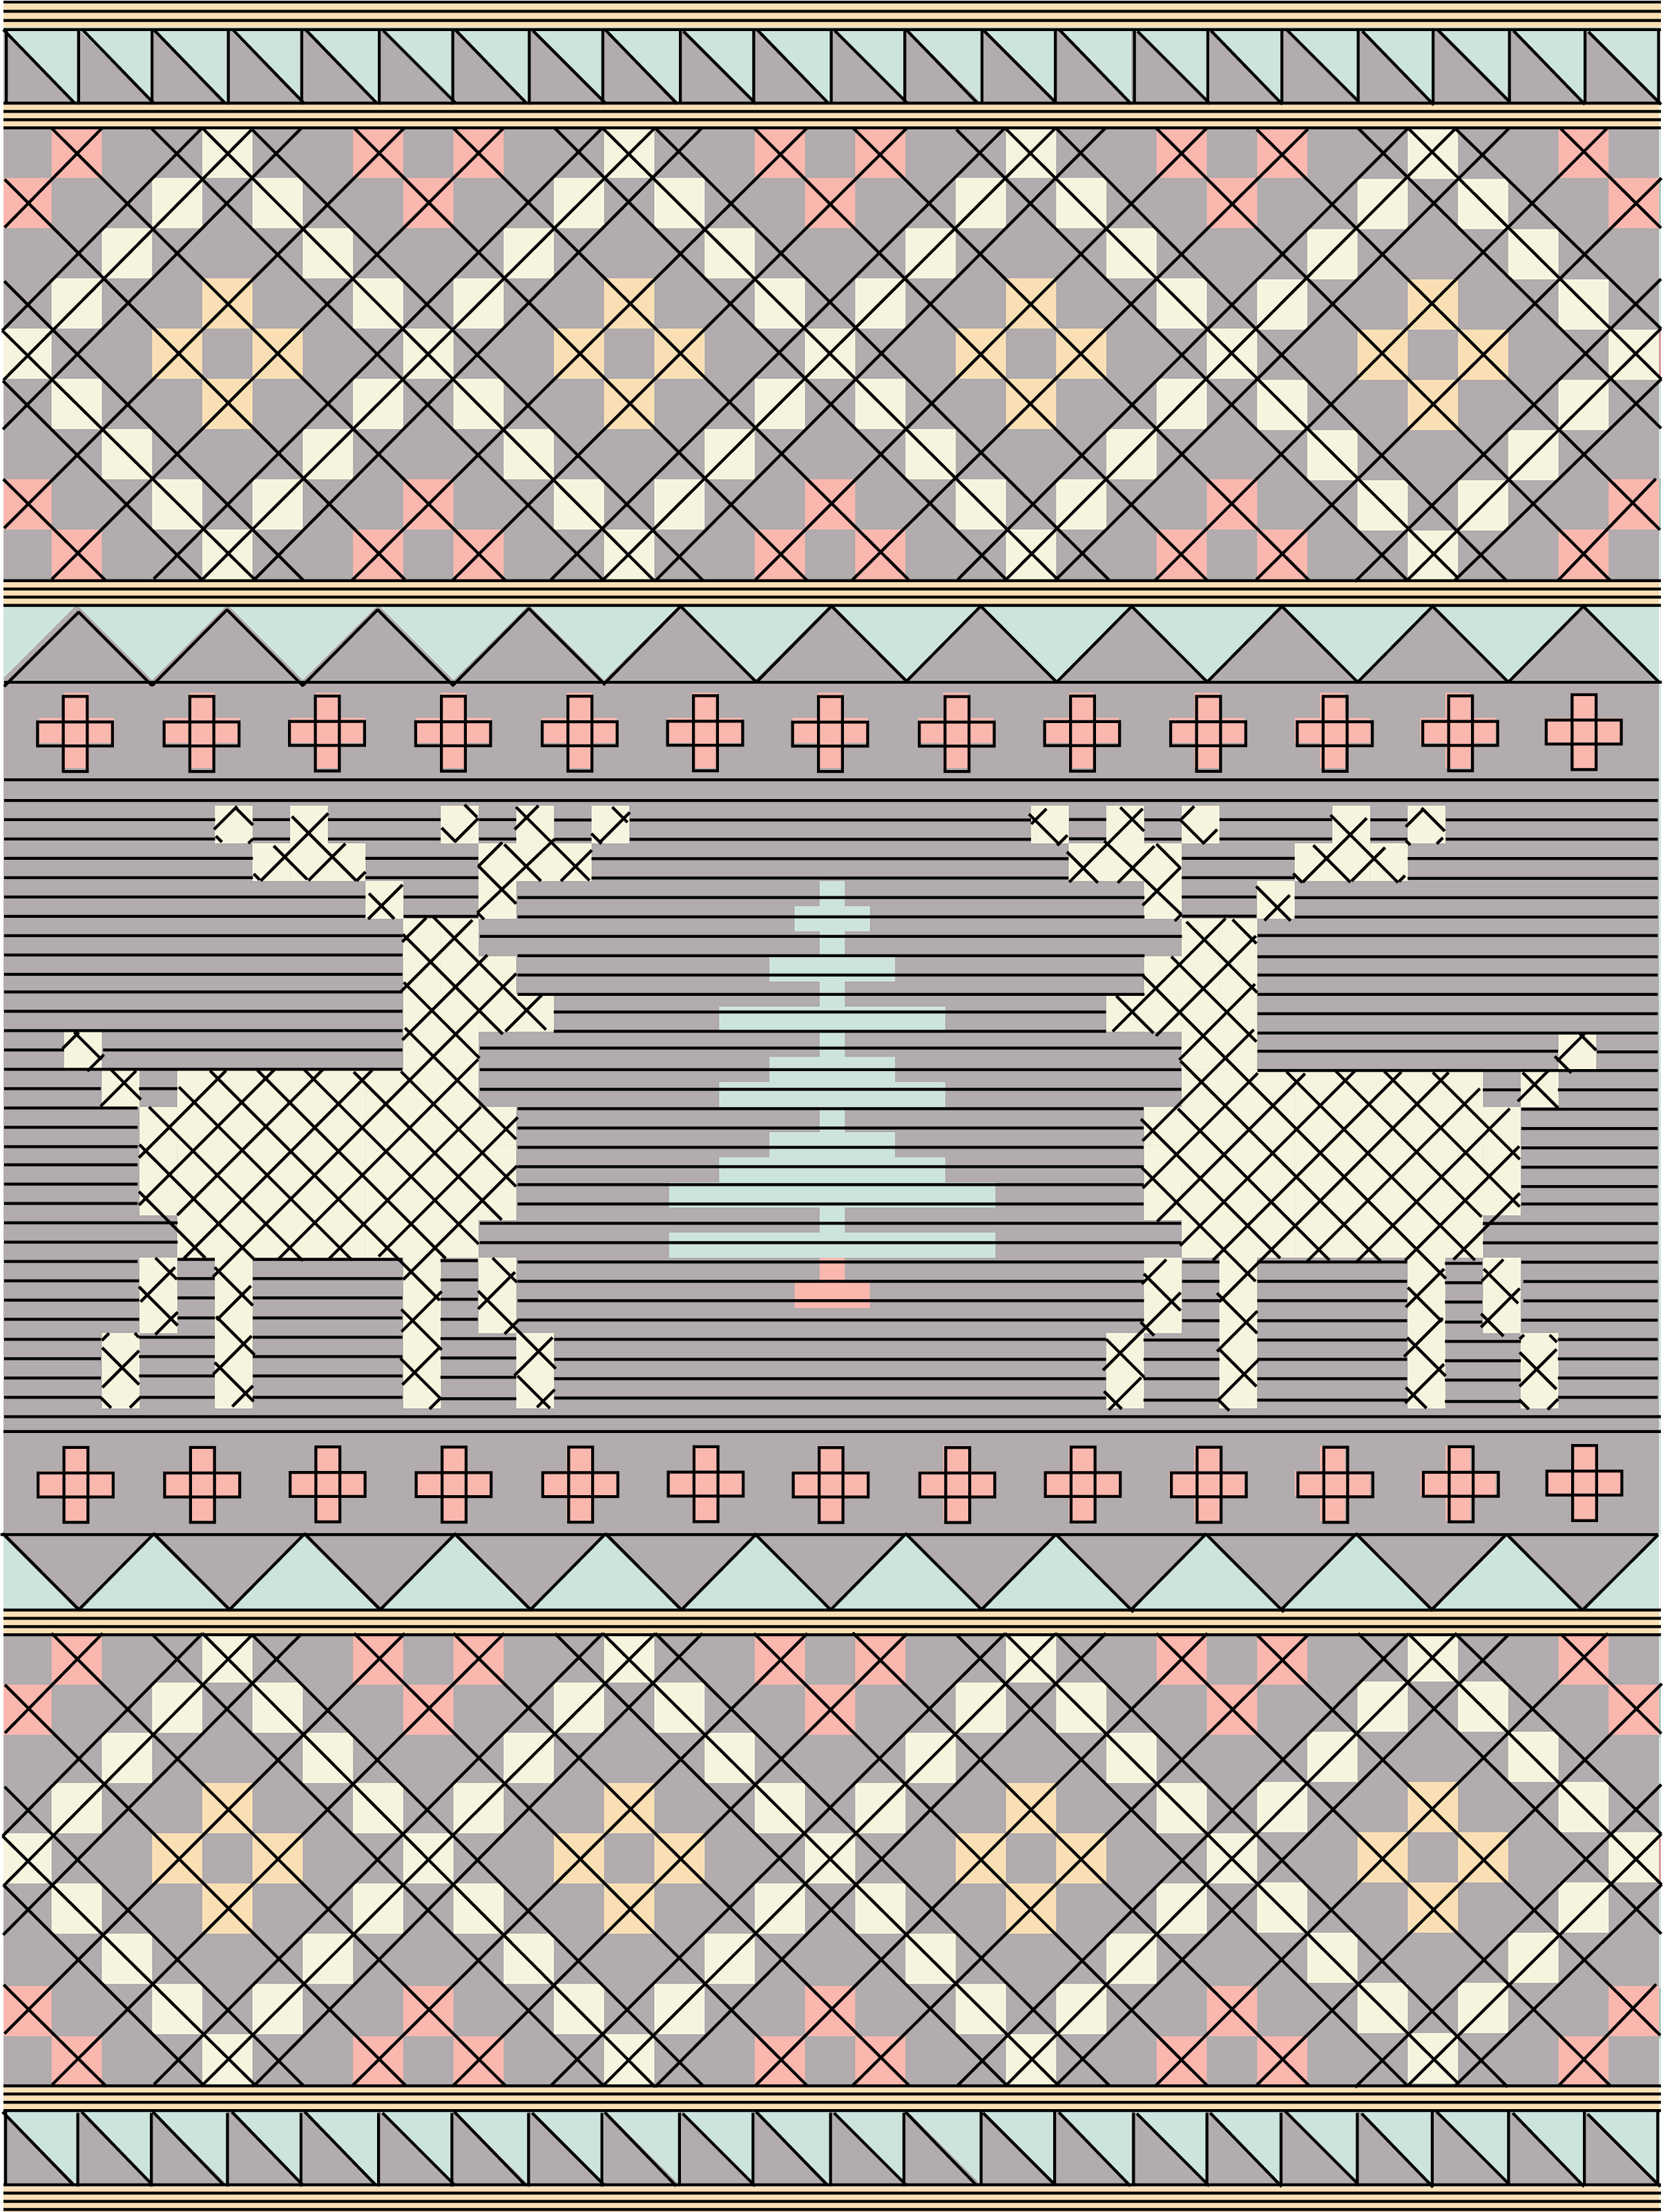
For my first version of this quilt, I quilted it at home on my regular machine. It doesn’t do free motion or anything fancy, so I decided to lots of straight line quilting that echoed the piecing. Below is my sketch with my quilting plan in black lines…

My favorite part of this quilt top was the cross-hatching on the reindeer. It made them look so cute! The center panel took the most time with having to bury lots of threads, but I really liked how it turned out. It took several sketches to figure out what I wanted to do. I find that drawing things out on a printed mock up of the quilt is my favorite way of making a quilting plan.
I made a couple print outs for you, so you could doodle your own quilting plan! Just click the design you want and print out as many as you need to doodle your quilt design.
I hope this post gave you a few ideas or a jumping off point to get your quilting done. Once I get mine back, I’ll post pictures and show you the final goodness 🙂 By fall, we’ll all be cuddled up under our adorable quilts. Happy quilting friends!!
One last thing, don’t forget about my $50 Etsy gift card final quilt along prize. To win, just post a picture of (at least) your completed quilt top (it doesn’t have to be quilted yet!) on Instagram (be sure to tag me @michellebartholomew). I’ll pick a winner on Tuesday, Sept. 6th! If you’re not on Instagram, email me your picture to be entered 🙂
I wanted to thank you all for coming on this quilt along journey with me. I hope these posts were helpful and you love the final result.


